A dining table is the piece of furniture that carries the most history and the least padding. It has held holiday dinners, homework and every difficult conversation in between, and it is also large, awkward and surprisingly easy to scratch. Tables get damaged in familiar ways: a leg that was left on and snapped at a doorway, a glass top that rode flat, or plastic wrap pressed against a wood finish for the whole trip.
The short version is simple. Take the table apart when you can, protect every surface with moving blankets before anything plastic touches it, carry heavy tops on their edge, and keep the hardware attached to the piece it belongs to. The rest of this guide shows how to do that for wood, glass and stone, and how to handle the awkward cases such as extension leaves, pedestal bases and tables that do not come apart.
Quick reference: how to protect each part
| Part of the table |
What to do |
How it travels |
| Wood tabletop |
Clean, cover with moving blankets, then hold the blankets with stretch wrap over the padding |
On its edge for large tops, or flat only if it is light and well supported |
| Glass tabletop |
Remove from the base, protect the edges, pad both faces and sandwich between cardboard |
Standing on its edge, never flat |
| Stone or marble top |
Remove from the base, pad heavily, protect the edges |
Standing on its edge with several people handling it |
| Extension leaves |
Remove, wrap each one separately |
Stacked flat with padding, or on edge beside the top |
| Legs and pedestal base |
Unscrew where possible, wrap separately |
Packed together with the hardware bag kept nearby |
| Hardware |
Bag, label and keep with the wrapped piece it belongs to |
Never loose in a random box |
What you need before you start
Gather everything first so you do not interrupt the job halfway through:
- Moving blankets or furniture pads, enough to cover the top, the legs and the base separately.
- Stretch wrap, to hold padding in place over the blankets.
- Corner and edge protectors, or flattened corrugated cardboard cut to size.
- Bubble wrap, used only on glass or around hardware, never directly on wood.
- Resealable bags and a marker for screws, bolts and brackets.
- A screwdriver, a wrench or an Allen key set, whichever your table uses.
- A phone to take photos.
- Furniture sliders if you will be moving the table across a smooth floor.
- Strong helpers. A large table is a two-person job at minimum.
If you are buying supplies, get enough blankets to cover the top, the legs and the base separately, and a few extra so you never have to improvise.
Step 1: Plan the route and the ride
Before touching a screw, measure the table at its widest point and measure every doorway, hallway turn and stairwell it will pass through. Compare that with the width of the opening on the truck or van. If the table is fixed and cannot come apart, this check tells you whether you need to plan a tilt at a doorway or a different exit.
Decide where the table will ride in the vehicle. Tabletops usually travel on their edge against a wall of the truck, so leave room for them and plan to load them where nothing heavy can shift into them. Deciding this now avoids last-minute improvising once the truck is half full.
Step 2: Photograph the table and its connections
Take a set of photos before you remove anything. Capture the whole table from several angles, then take close-ups of how the legs attach, how the leaf stores, where brackets sit and which screws go in which holes. The photos will guide reassembly at the new place, and they also act as documentation of the table’s condition if you ever need to file a damage claim.
If your table has a manual, find it and keep it with the hardware. Many extension tables have a specific sequence for removing the mechanism, and the manual explains it.
Step 3: Clean and dry the surface
Wipe the table to remove dust, crumbs and grit, which can scratch a finish when padding is pressed against it. Let the surface dry completely before you wrap anything. Moisture that gets trapped under blankets or plastic during a long ride can mark the finish or cause wood to swell or warp.
Polish or wax is optional, and only worth using if the product suits your finish. The goal is a clean, dry surface, not a new one.
Step 4: Take the table apart
Disassembly is the single most useful thing you can do. A table without legs is lighter, fits through doors more easily and is much harder to damage. Work in this order:
- Remove the leaves. If the leaf is stored under the table, take it out. Each leaf gets wrapped on its own.
- Lift off any detachable top. Glass and stone tops often sit on the base and can be removed. Do this with two people.
- Unscrew the legs. Keep the screws, bolts and brackets together as you go.
- Separate the base or pedestal if it comes apart.
- Secure drop leaves. On a drop-leaf table, lower the leaves and hold them in place with padding and wrap so they cannot swing.
Put the hardware in a labeled resealable bag and keep it with its piece, for example by attaching the bag to the wrapped padding of the leg set. Avoid taping the bag directly to the wood finish, because adhesive can leave marks. Write something specific on the bag, such as “dining table leg bolts”, rather than a vague word like “screws”.
Step 5: Wrap the tabletop by material
How you protect the top depends on what it is made of.
Wood
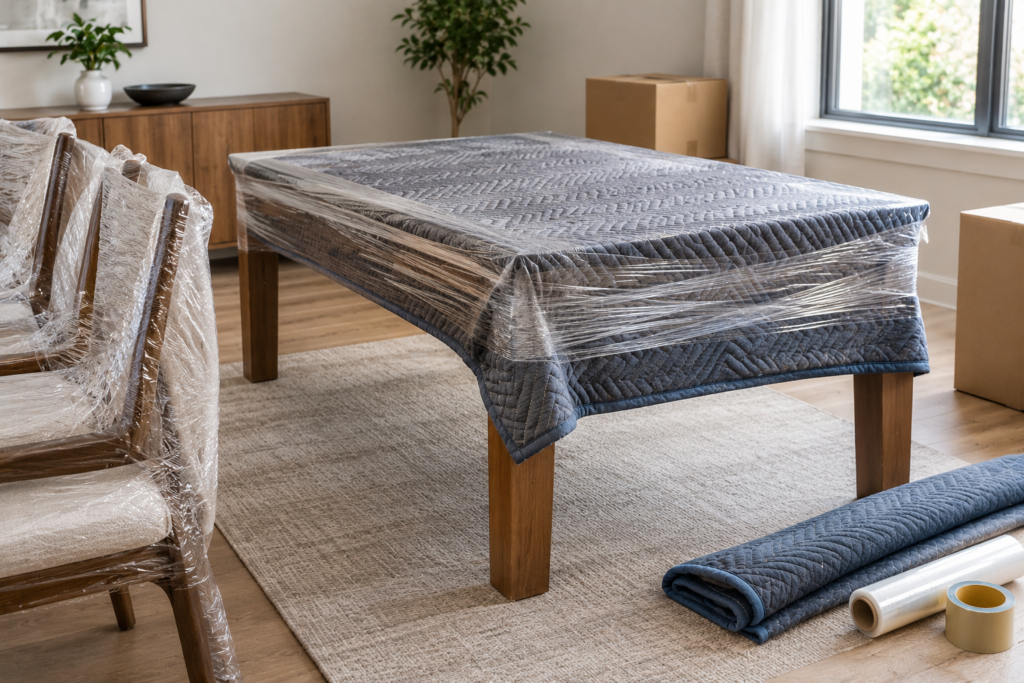
Cover the entire surface with a moving blanket, extending it over the edges and corners, which are the most likely places to chip. Overlap blankets generously where one is not enough. Then secure the blankets with stretch wrap wound over the padding, not against the wood. Plastic pressed directly onto a finish can trap moisture and leave marks, and tape stuck to a finished surface can pull off the finish or leave residue.
For large wood tops, carry them on their edge rather than flat. A lighter, disassembled top that is only crossing one level can slide on furniture sliders instead of being carried.
Glass
Glass is heavy and unforgiving, so treat it as the most fragile part of the whole move.
- Remove it from the base. Even a thick top is safer when it is carried alone.
- Protect the edges first, because a chipped edge weakens the panel.
- Pad both faces with blankets or packing paper, add bubble wrap, and sandwich the glass between cardboard sheets.
- Keep strong adhesive off the surface. Tape belongs on the padding, not on the glass.
- Carry it upright on its edge, as you would carry a sheet of plywood, with two people, and never stack anything heavy on it.
Some people also run masking tape across glass to help hold fragments together if it cracks. That is an extra precaution, not a substitute for padding.
Stone and marble
Stone tops are similar to glass in weight and in the cost of a mistake. Remove them from the base, pad them thoroughly, add edge protection and carry them on their edge with enough people to control the weight. If the top is too heavy for the people you have, that is the point to bring in a crew rather than push your luck.
Step 6: Wrap the legs, base and leaves
Each part gets its own protection. Wrap the legs separately in blankets or furniture pads and secure the padding with wrap or tape applied over the padding, not onto the legs. For a pedestal base, wrap the column and the feet, paying extra attention to any carved or turned detail. Leaves are flat and easy to scratch, so pad them as you would a small tabletop and keep them together so they do not get separated.
Group the wrapped pieces so they travel as a set: legs together, leaves together, the base on its own, and the hardware bag fixed to the wrapped padding of the largest piece. A short label on each bundle, such as “dining table, legs, 4 of 4,” saves time when unpacking.
Step 7: Load and secure the pieces
How the table is loaded matters as much as how it is wrapped.
- Load tabletops on their edge, padded on both sides and secured to the wall of the truck so they cannot slide or tip.
- Wedge blankets into gaps to keep pieces from shifting on rough roads.
- Keep heavy boxes away from tabletops and never stack weight on a glass or stone top.
- Place legs and bases where they cannot be crushed or rub against hard surfaces.
- Put the hardware bag in a spot you will remember and can reach quickly at the new address.
If you are using a rental truck or a van, tie-down tracks or straps help keep the load from moving through turns and stops.
Step 8: Unload and reassemble
At the new home, carry the pieces in and unwrap them carefully, saving the padding for reuse. Check the table against your photos, then reattach the legs and hardware before setting the table upright in its final position. Tighten bolts snugly without forcing them. Put the leaf back last.
After reassembly, walk around the table and inspect each surface. If you find damage, take photos right away and note it on any paperwork, then contact the company that moved it. The initial photos from Step 2 help show what the table looked like before the move.
Special cases
Tables that cannot be disassembled
Some tables have fixed legs or a single carved piece that is not designed to come apart. In that case, pad the legs and joints heavily, wrap the whole table in blankets, protect the corners with cardboard or corner guards and move it with enough people to lift rather than drag. Measure the route twice, because a table that cannot shrink has to fit the opening as it is. Furniture sliders help on level floors, and a doorway that is tight is worth solving before moving day.
Extension tables and leaves
Extension mechanisms vary by design, so check the manual and photograph the mechanism before disassembling. Slide the leaves out, wrap each one and keep any hardware that locks the mechanism together. Do not force parts that resist, since that is how rails and guides bend.
Pedestal tables
A pedestal table rests on a single base, so treat the top and the base as two separate jobs. Remove the top if it unscrews, wrap the base on its own and carry both with care. Add extra padding around the column and feet, especially if they are turned or carved.
Antique, high-value or heirloom tables
If the table is an antique, a family heirloom or a piece worth significant money, the stakes rise. Fine finishes, old joinery and irreplaceable details are easy to damage and difficult to repair. This is the situation white glove moving is designed for, with a careful breakdown, transport and reassembly handled by a crew that plans the handling around the piece.
Common mistakes
- Leaving the legs on. It saves a little time and leaves long, unprotected legs to catch on the first doorway.
- Wrapping plastic directly on the finish. Blankets first, plastic only over them.
- Carrying glass flat. Glass belongs on its edge.
- Skipping the photos. They are the fastest way to reassemble a table and the best evidence if something goes wrong.
- Tossing the hardware into a random box. A missing bolt can turn a Saturday into a hardware store trip.
- Underestimating the weight. Stone and glass tops need more hands than people expect.
- Taping the finish. Tape belongs on the padding.
- Measuring after the table is already stuck. A route check takes minutes before the move and can save hours on the day.
When it makes sense to hand it to professionals
Plenty of people pack their own dining tables without trouble. Some situations tip the balance toward a crew: a heavy solid wood table, a stone or oversized glass top, a table that does not come apart, a tight stairwell or an elevator building with strict rules, or a piece with sentimental or financial value that you cannot risk.
Professional crews arrive with blankets and supplies and know how to handle the awkward moments, from lifting a top through a narrow door to leaving the table assembled in the right room. If a full pack is what you need, our packing services page explains how crews arrive with boxes, tape, bubble wrap, wardrobe boxes and furniture blankets and work through the home room by room. For tables that are antiques or high-end pieces, the white glove moving service page describes careful breakdown, transport and reassembly. If you would rather do it yourself with a few extra pointers, our guide to moving furniture properly covers general do’s and don’ts, and our walkthrough on packing fragile items without damage helps with glass, lamps and decor that share the dining room.
A table that arrives the way it left
The best table move is the one nobody remembers: the top arrives without a mark, the legs go back on in minutes and the hardware is exactly where it should be. That comes from a few decisions made early, which are to photograph first, take it apart, protect every surface with padding before plastic, and plan the route before lifting. Do those four things and a dining table is one of the more manageable pieces in the house.